
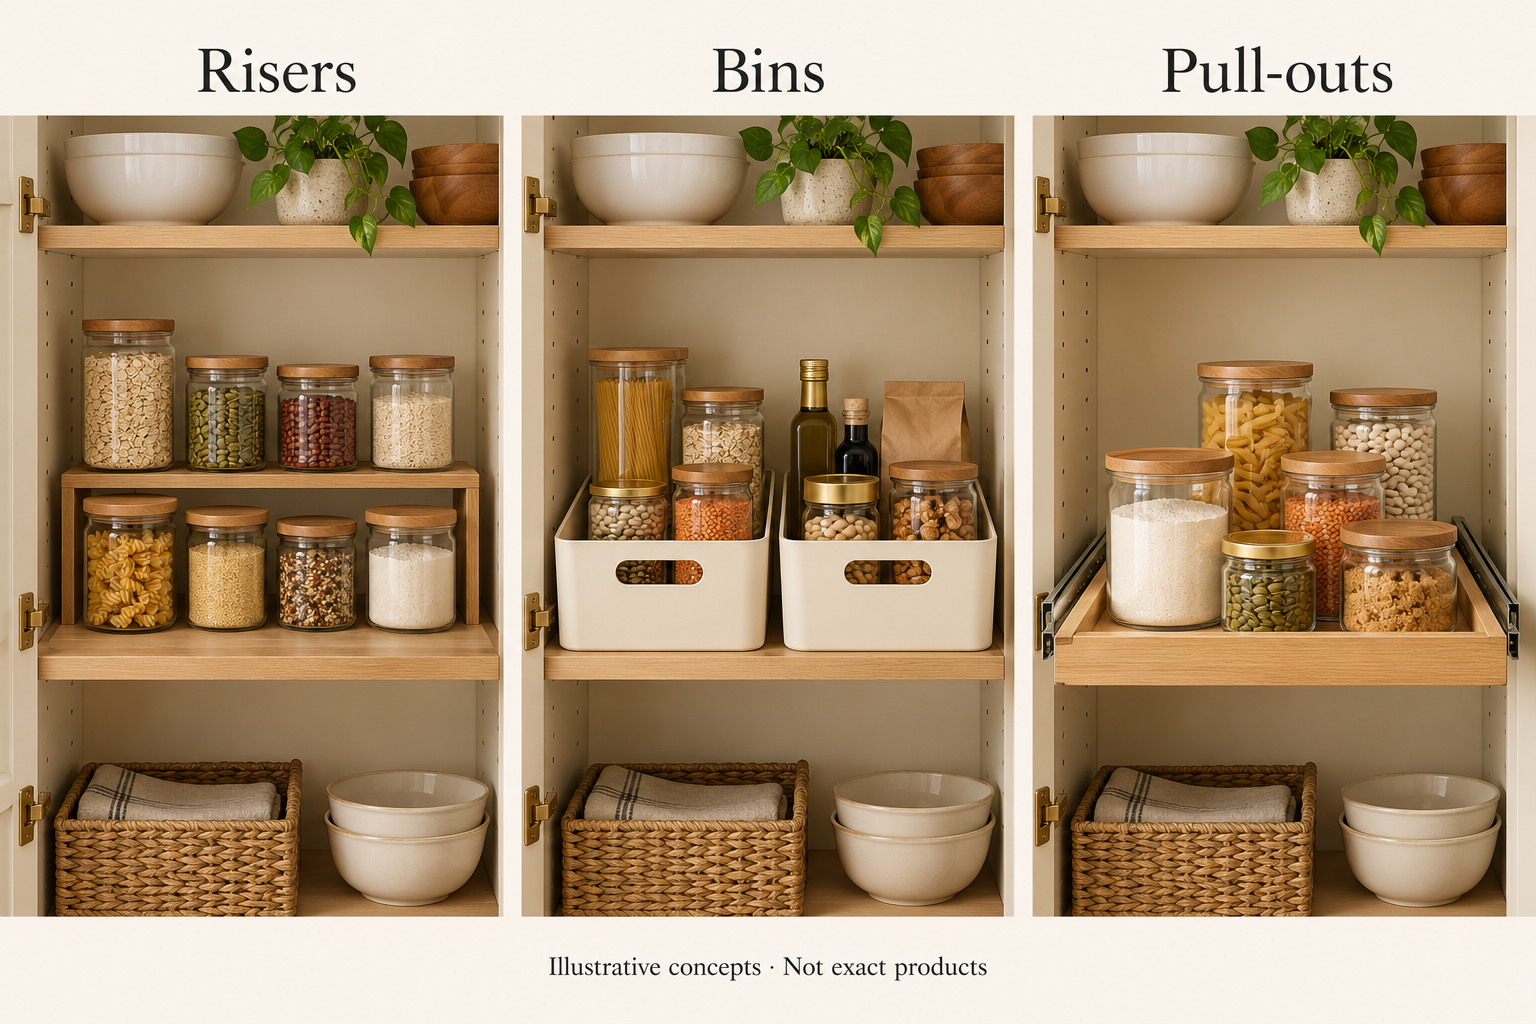
Featured image: AI-generated illustrative concepts, not exact products or tested installations.
Deep pantry shelves can hold plenty and still make dinner harder. A bag disappears behind a box. The spare jar hides behind three open ones. Finding one ingredient means unloading half a shelf.
Before buying an organizer, identify the frustrating part: seeing what you have, reaching it, or lifting it out. Those are different problems, and they do not always need the same solution.
The quick answer
- Choose bins when loose packets and small packages need grouping, and you can comfortably move the loaded container.
- Choose risers when short jars or cans disappear behind the front row, but you can already reach the back.
- Consider pull-outs when reaching into the cabinet is the main problem, particularly if lifting out a whole bin would be awkward.
A mixed setup often makes more sense than matching organizers on every shelf. Start with the shelf that frustrates you most.
Bins: bring a category forward
A bin gives a group of items a boundary. Baking packets, snack bags, and small boxes are easier to retrieve together than individually from a dark corner. A front label can identify the category even when you cannot see every package.
The catch is the loaded weight. An empty bin may feel effortless; the same bin filled with cans or jars may be difficult to pull forward, support, and put back. A handle does not change that weight.
Consider two narrower bins rather than one wide container. Smaller categories can be easier to manage, though the extra walls and gaps use space. Check exterior dimensions, including handles, rather than relying on the capacity description.
Bins work best when you can grasp them without squeezing your fingers against the shelf above. Avoid a setup that requires lifting a heavy container down from overhead just to find one ingredient.
Risers: reveal the back row
A stepped riser raises rear items so their tops or labels are less likely to disappear behind the front row. It suits relatively short, stable containers when visibility is the problem.
It does not bring anything closer. If reaching the back already feels awkward, a riser may leave that problem unchanged. It also takes away vertical space, so check the height of your tallest container on the highest tier.
Look at the depth of each step, not just the organizer’s overall dimensions. Your jars need to sit securely on the usable surface. If retrieving one still means moving several others, simpler rows may be more useful than another tier.
Pull-outs: reduce the reach
A pull-out brings stored items toward the cabinet opening. It can be a better direction when you want access to the back without lifting an entire loaded bin.
The trade-off is a more demanding fit check. The frame, runners, and tray take up space, and the opening must accommodate the moving assembly. Extension travel matters too: check how far the organizer actually comes out, rather than assuming every item will clear the cabinet.
Manufacturers specify requirements for individual systems, including installation dimensions, door clearance, and load limits. Some distinguish between per-shelf and total capacity. Check the exact model’s documentation and follow its installation specifications. Häfele’s technical specifications illustrate these separate requirements.
Measure the route, not just the shelf
Record the clear opening’s width and height, plus the usable interior depth and space between shelves. Check the narrowest point an organizer must pass through, including the face frame and projecting hinges. Open the door as far as it normally goes and note whether it obstructs that path.
Allow for the organizer’s full exterior dimensions, the items inside it, and room for your hands. For a pull-out, also check the space in front of the cabinet needed for its specified travel.
Rev-A-Shelf’s measuring guidance calls for width, depth, and height measurements and explicitly says to account for obstructions such as hinges. Compare your measurements with the manufacturer’s minimum-opening requirements, not the cabinet’s nominal size. See its cabinet measuring guide.
Try this before buying anything
Choose one shelf. Bring frequently used items forward and group duplicates behind their matching open package. Then try an existing, sturdy, suitably sized container for one lightweight category. Do not assume a cardboard box can support a heavy load.
Use that arrangement through several normal meals. Notice what still slows you down:
- Cannot tell what is behind the front row? Test whether rearranging by height helps.
- Can see it but cannot comfortably reach it? Focus on bringing items forward.
- Can reach the container but dislike lifting it? Reduce the load before choosing a bigger bin.
Before-buy checklist
- I know whether I am solving visibility, reach, or lifting.
- I measured the clear opening, hinges, depth, and available height.
- I checked exterior dimensions, hand space, and door clearance.
- I considered the actual loaded weight, not just empty-container convenience.
- For a pull-out, I checked travel, load limits, and installation requirements.
Buy for the movement you want to make easier. A successful pantry setup lets you find an ingredient, retrieve it, and put it back without rearranging everything else.